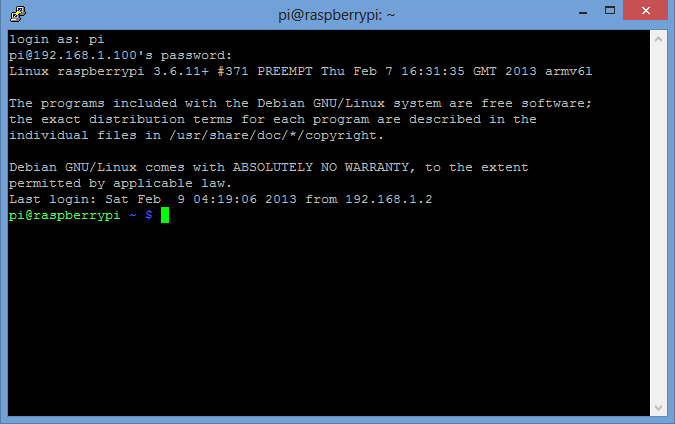
If you’ve just got a new Raspberry Pi and don’t have a monitor to try it out, fear not. The latest Debian Wheezy distributions have SSH enabled on default, thus enabling us to log in if we have a net connection to the RPi.
Note: You should have a Linux distribution running since we are going to modify some files in the SD Card which will have a Linux File System.
First, write the latest Debian Wheezy Image in to a SD Card using Win32DiskImager.
Then we are going to open a file in the SD Card so switch to your favorite Linux distribution (Ubuntu anyone? ) Hopefully your SD Card will already be mounted, otherwise google to find how.
I used Fedora 18, so it was mounted in
/run/media/sagara/62ba9ec9-47d9-4421-aaee-71dd6c0f3707
where ‘/’ signifies the root file system of the your computer (not the Pi). Type “mount” in a terminal to find the SD Card if it’s not displayed in the desktop.
Now we must give our Raspberry Pi an IP Address. This will enable us to connect to the RPi through SSH. By default, the RPi is configured to receive an IP address from a DHCP server. What we’ll do is change this default setting to a static IP address of our choosing. These settings are recorded in a file called ‘interfaces’ in /etc/network/ where ‘/’ signified the root in the Raspberry Pi SD Card.
Therefore to open this file, the full path for the ‘interfaces’ file for me would be
/run/media/sagara/62ba9ec9-47d9-4421-aaee-71dd6c0f3707/etc/network/interfaces
To open it, type the following in the terminal taking care to replace the path with your path. This will open the file in the ‘nano’ text editor.
sudo nano /run/media/sagara/62ba9ec9-47d9-4421-aaee-71dd6c0f3707/etc/network/interfaces
Then comment out the ‘dhcp’ line and modify it like the following. I have chosen to give my RPi the address 192.168.1.100
auto lo

iface lo inet loopback
#iface eth0 inet dhcp this is a comment
iface eth0 inet static
address 192.168.1.100
netmask 255.255.255.0
gateway 192.168.1.1

allow-hotplug wlan0
iface wlan0 inet manual
wpa-roam /etc/wpa_supplicant/wpa_supplicant.conf
iface default inet dhcp
Save and exit nano. Now you have given your Raspberry Pi a static IP address. Since we are not using a router to connect to the Pi, we’ll be using a RJ45 Ethernet cable a.k.a ‘Crossover’ cable. So connect your RPi and Laptop/PC together with the cable.
Now if you know a teensy bit about networking, this won’t sound peculiar; you have to give the Ethernet port on your Laptop/PC and the Ethernet port on your RPi, unique, valid IP addresses which are on the same network. We have already given an IP address and a network address for the Pi. (see the address and netmask values). The only thing remaining is to give the Ethernet port on our Laptop/PC an IP address on the same network. I have chosen to give 192.168.1.2 as the IP address of my laptop.
If you are on Windows, open the Network and Sharing Center and click on the Ethernet connection properties.
Then in the IPV4 properties choose “Use the following IP address” and put,
IP :         192.168.1.2
Subnet Mask: 255.255.255.0
Gateway:     192.168.1.1
Then download PuTTy. It’s a SSH client for windows. Start it and put 192.168.1.100 as the connecting address and now you can connect to your Raspberry Pi!!
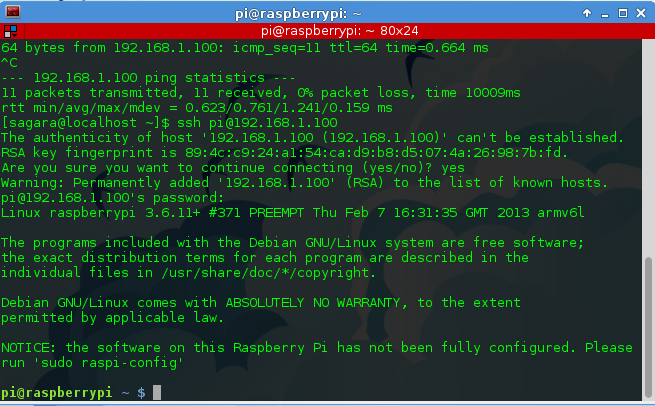
You can also do this in Linux. All you have to do is assign a static IP address to the Ethernet port. SSH is already installed on most Linux distributions so PuTTy will not be needed. Here’s a snapshot of SSH-ing to my RPi from Fedora.
After this, you may want install a VNC Server on your Pi. That will enable you to use the screen in your laptop as a monitor for the Raspberry Pi.
Check it out: http://elinux.org/RPi_VNC_Server


The SD card on ubuntu is showing read only, so I can’t edit the file “interfaces”. I have checked the SD card lock switch it is in right mode. Help….
I googled and found two ways.
1. Restart your computer with your SD card loaded inside. Then try again.
2. If that also failed, open a terminal and type this to find your SD card’s name (I’ll call this “your_device”)
fdisk -l (//not number 1)
After that type
sudo mount -o rw /dev/your_device /any_directory
anyway to skip the raspi-config on first boot? recent versions of raspberry come with ssh enabled by default but its stuck on the raspi-config screen. Tried the above method also but didn’t go thru. any suggestions?